


BFarber – Windows Tutorials, PC Fixes and Tech How-Tos
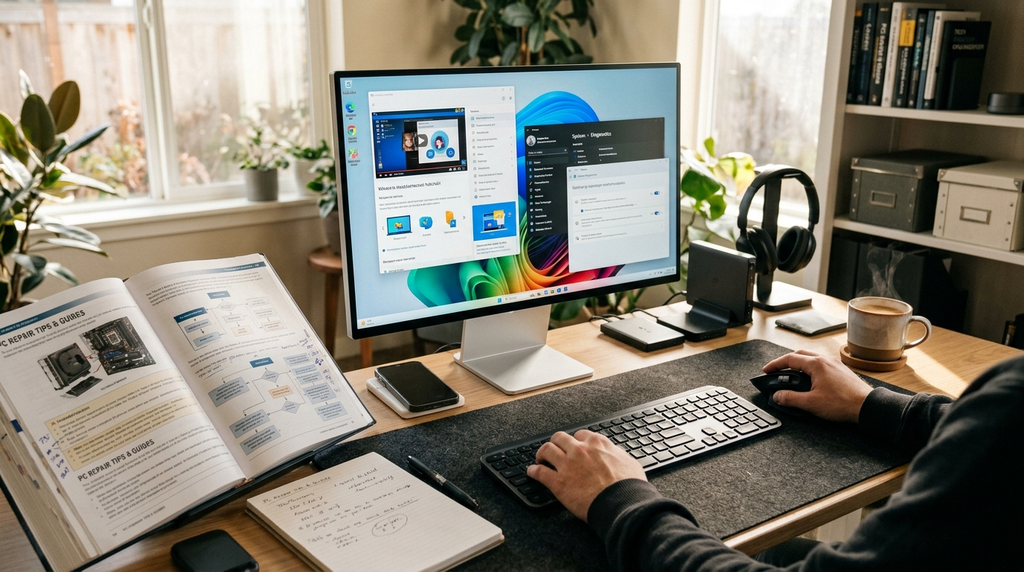
Getting more from your PC should not feel like learning a foreign language. BFarber offers clear, practical help for people who want straightforward computer guidance. We built it because much online tech advice is outdated or more complex than needed.
We provide simple windows tutorials, real fixes and honest advice for UK readers. Our guides avoid jargon and fluff, offering useful steps you can follow today. We test every guide on real systems before publishing.
You may set up a fresh system, learn Windows 11 tips, check faulty RAM, or build a PC from scratch. These guides cover basic system setup, advanced troubleshooting and complete PC builds.
Our windows tutorials support everyday users, students, gamers and home office workers. If a tech problem has left you stuck, you are in the right place. We want every reader to know a little more than before.
Key Takeaways
- BFarber provides practical PC guidance for UK readers, from basic setup to advanced builds.
- Content covers step-by-step guides, troubleshooting fixes, and genuine tech how-tos.
- Every guide is tested on a real system before publishing.
- Suitable for everyday users, students, gamers, and home office workers.
- Topics range from operating system tips to RAM diagnostics and full PC building.
- Clear, jargon-free steps you can follow straight away.
What Makes BFarber a Trusted Hub for Windows Tutorials
Some websites offering windows tutorials have not tested their steps on a real computer. We test every guide on our own machines before publishing it, following each step as you would at home.
This hands-on method helps us spot small problems, such as missing menu options or settings moved elsewhere. We prefer spending extra time testing rather than leaving you stuck halfway through a fix.
Our windows tutorials cover problems UK users really face, from slow laptops to updates that interrupt the working day. We focus on everyday situations, not unusual problems that rarely happen in real life.
We remove technical jargon and use clear language, so you do not need a computer science degree. Each guide uses numbered steps or clear bullet points, making it easy to track your progress.
A few principles guide everything we publish:
- Accuracy comes first, with every tutorial checked against the current version of Windows
- Instructions stay free from unnecessary technical complexity
- Steps are numbered or listed clearly, so nothing gets missed
- Guides get updated as Windows changes, particularly with Windows 11 features
Windows changes often, and so do we. When Microsoft adds features or moves settings, we review and update our content. Then, when you follow our windows tutorials, the information matches your screen instead of an outdated version from months ago.
Essential Windows Tutorials for Everyday Tasks
From switching on a new PC to managing updates and settings, Windows brings many small challenges. Our windows tutorials focus on tasks people search for, rather than obscure cases nobody uses.
We explain each process in clear steps, so you can follow without guesswork. Whether you have unboxed a laptop or need more control, this section covers useful basics.
Setting Up Windows for the First Time
A new Windows installation asks many questions at once. Making good choices early saves time and helps prevent privacy problems later.
We recommend following the initial setup in this logical order:
- Choose your region and keyboard layout before anything else loads.
- Connect to Wi-Fi so updates and account verification can proceed smoothly.
- Create a Microsoft account or set up a local account, depending on your preference.
- Review privacy settings carefully, especially location tracking and diagnostic data sharing.
- Install essential drivers and check Windows Update for any pending patches.
Many windows tutorials warn that skipping the privacy screen is tempting. However, spending two extra minutes is worthwhile because default settings may share more data than users realise.
Customising System Settings for Better Control
Once Windows runs, the real work begins. Default settings rarely suit everyone, so small changes can make a big difference.
Review these areas first:
- Display settings, including scaling and refresh rate, for a sharper visual experience.
- Notification preferences, so only the apps you care about interrupt your work.
- Accessibility options, such as text size, contrast themes, and narrator tools.
- Default apps, ensuring your preferred browser and media players open automatically.
These small changes make daily use more comfortable. We have found that ten minutes in Settings after a fresh install helps for months.
Managing Updates Without Disruption
Windows updates protect security, but they often arrive at the worst time. Fortunately, a few setting changes can greatly reduce the disruption.
This table shows Windows’ main update controls and explains each one’s purpose.
| Update Setting | What It Does | Why It Helps |
|---|---|---|
| Active Hours | Tells Windows when you’re typically using the PC | Prevents automatic restarts during work sessions |
| Pause Updates | Delays updates for up to five weeks | Useful before deadlines or important presentations |
| Delivery Optimisation | Controls how update files are downloaded and shared | Reduces bandwidth strain on slower connections |
| Update Notifications | Shows alerts before installing major updates | Gives you time to save work and close programs |
Set Active Hours to match your real schedule instead of keeping the default. Alongside occasional pauses, this simple change keeps interruptions to a minimum.
These windows tutorials cover setup, settings, and updates, forming a foundation for the rest of the site. Learning these basics makes advanced tweaks feel much less intimidating later.
Boosting Performance with Simple Windows Tweaks
Speed problems rank among the most frequent pc troubleshooting concerns we encounter, yet fixes are often simpler than people expect. Before reaching for new hardware, we recommend three practical tweaks targeting disk clutter, startup load, and power settings.
Together, these adjustments can transform a sluggish machine into a responsive one within an afternoon. None require technical expertise or money for upgrades.
Freeing Up Disk Space and Reducing Clutter
A nearly full hard drive forces Windows to work harder than it should. File indexing slows down, virtual memory struggles, and everyday tasks begin to lag.
For pc troubleshooting, Storage Sense is built into Windows and runs automatically in the background. It clears temporary files, empties the recycle bin, and removes old downloads once set up correctly.
- Open Settings, then navigate to System and select Storage.
- Turn on Storage Sense and choose how often it should run.
- Run Disk Cleanup manually for a deeper scan of system files.
- Review the Downloads folder and delete anything you no longer need.
We also suggest uninstalling programmes you rarely use. Many machines hold years of forgotten software that quietly consumes space and resources.
Adjusting Startup Programs and Background Apps
Boot times often suffer because too many applications launch automatically. Each one competes for memory and processing power before you even open a browser.
Task Manager gives you full control over this. Open it and click the Startup tab to see every programme set to launch with Windows. It also shows each programme’s measured impact on boot time.
- Press Ctrl, Shift, and Esc together to open Task Manager.
- Select the Startup tab and review the listed applications.
- Right-click anything unnecessary and choose Disable.
- Check Settings for Background Apps and switch off ones you don’t need running constantly.
Disabling a handful of non-essential entries can shorten your boot sequence. It is one of the quickest wins in any pc troubleshooting routine we recommend to readers.
Optimising Power Settings for Speed
Power plans affect how strongly Windows manages your processor, screen brightness, and background tasks. The wrong setting can waste performance, particularly on laptops.
Desktop users generally benefit from higher performance plans since battery life is not a factor. Laptop owners need to balance speed against how long their charge lasts between sessions.
| Power Plan | Performance Level | Battery Impact | Best Suited For |
|---|---|---|---|
| Power Saver | Lower CPU speed, dimmed display | Longest battery life | Travel and extended unplugged use |
| Balanced | Adjusts automatically based on demand | Moderate battery drain | Everyday browsing and office work |
| High Performance | Maximum CPU and GPU output | Fastest battery depletion | Gaming, editing, and demanding tasks |
Switching plans takes seconds through the Settings app or the battery icon in the taskbar. It is a small change that often delivers a noticeable boost in responsiveness. This is especially useful during intensive tasks.
Strengthening Security Through Windows Settings
Protecting your computer does not require expensive software. Windows already includes powerful security tools. Many people overlook these settings, but our Windows tutorials show that correct setup takes minutes and improves security.
This section explains practical steps for keeping your system safe. We cover built-in protection, account management, and update habits that reduce risk together.
Configuring Windows Defender and Firewall
Windows Defender offers solid malware protection without costing a penny. Check that real-time protection is on, and run a full scan at least once a week.
The built-in firewall works with Defender to block unwanted connections. Most users do not need third-party antivirus software when these tools are set up correctly.
- Open Windows Security and confirm Defender is active
- Enable cloud-delivered protection for faster threat detection
- Check firewall rules to block unnecessary inbound connections
- Run periodic scans using the scheduled scan feature
These steps create a strong security foundation, a principle covered throughout our Windows tutorials.
Managing User Accounts and Permissions
Shared family computers benefit from separate accounts. We recommend using a standard account daily and saving administrator access for software installation or system changes.
This habit limits damage if malware gets through. A standard account cannot make system-wide changes without approval, adding another layer of safety.
| Account Type | Best For | Permission Level |
|---|---|---|
| Administrator | Installing software, system changes | Full control |
| Standard | Browsing, daily tasks, children’s use | Limited, requires approval for changes |
| Guest | Temporary visitors | Restricted, no saved settings |
Setting this up takes only a few clicks through the Family & Other Users menu in Settings.
Keeping Software and Drivers Up to Date
Outdated software is a common way attackers access systems. Regular updates fix known weaknesses, so check weekly instead of waiting for automatic prompts.
Driver updates matter as much as system patches. Old or mismatched drivers can cause security gaps and performance issues, which we cover later when discussing driver conflicts.
Windows Update handles most updates automatically. However, manufacturer websites often provide the latest driver versions sooner, so using both sources offers the most complete protection.
Getting More from Windows 11 Tips and Features
Windows 11 includes many useful tools beyond the familiar Start menu and taskbar. We tested these features so readers need not search through menus alone. These windows 11 tips can turn a standard setup into an efficient workspace.
Exploring Snap Layouts and Virtual Desktops
Snap Layouts arrange several windows on screen without manual resizing. Hover over an app’s maximise button to see a grid of layout choices. Choose a layout, then fill each section with an open window.
Virtual desktops improve organisation by providing separate screens for different tasks. One can hold work apps, another personal browsing, and a third a side project. Switching between them takes seconds, keeping everything tidy.
Name each desktop so you always know where to find things. This small habit saves time when managing several projects.
Using Windows 11 Widgets and Taskbar Tools
The redesigned taskbar centres icons by default, but you can move them left for a classic look. Right-click an empty area to open taskbar settings quickly.
The widgets panel sits left of the taskbar and shows weather, news and calendar updates. Pin useful widgets and remove the rest to avoid distraction.
Quick Settings opens from the system tray and groups Wi-Fi, volume, brightness and Bluetooth in one menu. This panel avoids full settings for routine changes.
Enabling Hidden Productivity Features
Several windows 11 tips focus on tools that people rarely mention. Yet these tools can speed up daily tasks noticeably. They are built in and ready to use:
- The improved Snipping Tool now records short screen videos alongside static screenshots, handy for quick tutorials or bug reports.
- Voice typing, triggered with the Windows key and H, lets you dictate text in any app without extra software.
- Focus sessions, built into the Clock app, combine a timer with Spotify integration and do-not-disturb mode.
Once enabled, these tools work quietly in the background whenever needed. A few minutes spent setting them up can make later work smoother and faster.
Diagnosing Common PC Troubleshooting Problems
PC troubleshooting feels less like guesswork when we know which tools to check first. Windows includes several built-in utilities that show what is happening behind the scenes.
Rather than restarting and hoping, we can find the real cause and fix it properly. Here are common issues UK users report, with typical causes and quick fixes.
| Common Problem | Likely Cause | Quick Fix |
|---|---|---|
| Slow performance | Too many background apps using RAM or CPU | End unnecessary tasks in Task Manager |
| Startup errors | Corrupted boot files or a failed update | Run Startup Repair from Safe Mode |
| Device not working | Outdated or conflicting driver | Update or roll back the driver in Device Manager |
| Random freezing | Overheating or failing memory | Check Resource Monitor and run a memory test |
| Blue screen on boot | Driver or hardware conflict | Boot into Safe Mode and inspect Device Manager |
Identifying Causes of Slow Performance
Sluggish performance usually means one resource is working too hard. Task Manager shows which processes use CPU, memory, or disk activity in real time.
Resource Monitor goes further by showing which files or services create a bottleneck. Here is how to check it yourself:
- Press Ctrl+Shift+Esc to open Task Manager.
- Click the “Processes” tab and sort by CPU or Memory usage.
- Identify any unfamiliar or resource-heavy programs.
- Open Resource Monitor via the “Performance” tab for more detail.
- End or disable processes that aren’t essential.
Resolving Startup Errors and Boot Failures
When Windows will not load, Startup Repair is usually our first step. It scans for missing or damaged system files and tries to repair them automatically.
Safe Mode helps isolate problems by loading only essential drivers and services. We can then check boot settings without interference from third-party software.
- Restart the PC and interrupt the boot process twice to trigger Recovery Mode.
- Select “Troubleshoot,” then “Advanced options,” then “Startup Repair.”
- If repair fails, boot into Safe Mode instead.
- Check Event Viewer for specific error codes.
- Use the Command Prompt to run “bootrec /fixboot” if needed.
Fixing Driver Conflicts and Device Issues
Outdated or conflicting drivers can make devices fail or vanish from Windows. Device Manager marks these issues with a clear yellow warning icon.
We can often solve this with a driver rollback or clean reinstall. Both options take only a few clicks.
- Open Device Manager by right-clicking the Start button.
- Locate the device showing a warning symbol.
- Right-click it and select “Update driver” or “Roll Back Driver.”
- If problems persist, uninstall the device and restart the PC.
- Windows will automatically reinstall a fresh driver on reboot.
Mastering these steps makes pc troubleshooting much less intimidating. With Task Manager, Safe Mode, and Device Manager, most everyday PC problems become manageable within minutes, not hours.
Dealing with Crashes, Overheating and Hardware Compatibility
Beyond everyday glitches, pc troubleshooting can reveal deeper hardware faults. Crashes, high heat, and compatibility issues can stop a system when software fixes fail. Reading the warning signs saves time and money.
Troubleshooting Blue Screen Errors
A blue screen of death, or BSOD, appears when Windows meets an error it cannot safely recover from. Each crash shows a stop code, which identifies the likely cause. Reading these codes turns a frustrating crash into a useful diagnostic clue.
Start with the Reliability Monitor, which records recent crashes and their exact error details. Event Viewer gives more detail and can show the driver or process that caused the failure. For ongoing crashes, Microsoft’s WinDbg tool can analyse memory dump files and locate the faulty component.
| Stop Code | Common Name | Typical Cause |
|---|---|---|
| 0x0000007B | INACCESSIBLE_BOOT_DEVICE | Storage driver or disk controller fault |
| 0x0000003B | SYSTEM_SERVICE_EXCEPTION | Corrupted system file or driver conflict |
| 0x000000D1 | DRIVER_IRQL_NOT_LESS_OR_EQUAL | Outdated or incompatible driver |
| 0x00000124 | WHEA_UNCORRECTABLE_ERROR | Hardware failure, often CPU or RAM related |
After finding the likely cause, update drivers, run a memory test, or check disk health. If crashes continue, a failing component, not software, is often responsible.
Managing Overheating and Thermal Throttling
Overheating makes components slow down deliberately through a process called thermal throttling. This protects hardware but reduces performance. Fan noise, sudden slowdowns, and unexpected shutdowns are common warning signs.
Tools such as HWMonitor and Core Temp track CPU and GPU temperatures in real time. Most processors should stay below 80°C under load. Graphics cards usually run safely up to about 85°C, but higher readings need attention.
Dust build-up is often the easiest problem to fix. Cleaning fans, heatsinks, and vents quickly restores airflow. In warmer UK months, better case ventilation or fresh thermal paste can improve stability.
Checking Hardware Compatibility Before Upgrading
Buying components without checking compatibility can waste money and cause frustrating returns. Before buying, confirm the motherboard socket, RAM type, and case space.
Power supply wattage needs special attention because newer graphics cards often need much more power than older models. Manufacturer websites and tools such as PCPartPicker can check whether components work together.
- Verify CPU socket type matches the motherboard
- Check RAM speed and generation support (DDR4 or DDR5)
- Confirm PSU wattage covers peak component demand
- Measure case clearance for graphics cards and coolers
Taking a few minutes to confirm compatibility prevents crashes and difficult pc troubleshooting later.
Understanding RAM Diagnostics and Memory Testing
When a computer acts strangely, faulty memory may be the hidden cause. Random freezes, damaged files and sudden restarts can all suggest a RAM problem. Many users, however, overlook this possible cause.
We believe ram diagnostics should be part of every troubleshooting routine. Memory testing needs no technical expertise, only suitable tools and some patience.
Running the Windows Memory Diagnostic Tool
Windows includes a built-in utility for checking memory health. It is free, simple and already installed, making it a sensible first step.
Here is how we recommend using it:
- Type “Windows Memory Diagnostic” into the search bar and open the application.
- Choose “Restart now and check for problems” to begin immediately.
- Allow your PC to reboot and run through its automated test cycle.
- Review the results once Windows loads back up, usually shown as a notification.
The process usually takes between ten and twenty minutes. The time depends on how much memory your system has installed.
Interpreting Memory Error Codes
After testing, you may see error codes that seem confusing at first. However, each code follows a pattern that shows what the problem means.
The common results below can help you understand them quickly.
| Error Code Type | What It Indicates | Recommended Action |
|---|---|---|
| No errors detected | Memory modules are functioning correctly | Investigate other hardware or software causes |
| Hardware error | Physical fault within a RAM stick | Reseat modules or replace the affected stick |
| Address error | Specific memory location fails to read or write correctly | Run extended tests to confirm before replacing |
| Multiple errors across modules | Possible motherboard slot or compatibility issue | Test each stick individually in different slots |
These differences help us identify a single faulty stick or a wider compatibility conflict.
Using Third-Party RAM Testing Software
Although the Windows tool suits quick checks, detailed ram diagnostics may need dedicated software. MemTest86 is our main recommendation for UK users wanting reliable, detailed results.
This tool runs outside Windows from a USB drive and tests memory more deeply. It performs several passes, finding intermittent errors that basic scans may miss.
Other trusted options include HCI MemTest and Windows Memory Diagnostic’s extended mode. They offer flexibility based on how much time you have available. We suggest running tests overnight because several passes improve detection rates.
Using these tools together gives you confidence before replacing RAM. This approach saves time and avoids unnecessary expense.
Fixing Common RAM-Related Problems
Faulty memory rarely shows a clear warning, but reliable fixes solve most RAM-related problems. Once our ram diagnostics confirm a problem, practical solutions are better than guesswork. This section covers trusted fixes, from quick checks to permanent replacements.
Troubleshooting Random Reboots and Crashes
Random reboots and sudden crashes often point to memory problems. Windows struggles to read or write data correctly when a module develops faults, so the system restarts without warning.
Check Event Viewer for Kernel-Power or MEMORY_MANAGEMENT errors before blaming other components. These logs often confirm what our ram diagnostics have suggested.
If more than one memory stick is installed, remove all but one and test the system. Swap sticks between slots to see whether the fault follows the module or stays with one slot. This quickly narrows down the culprit.
Reseating and Cleaning Memory Modules
Sometimes the fix is far simpler than a full replacement. Dust, oxidisation, or a loose connection can mimic hardware failure, so reseating the modules is worth trying first.
- Switch off your PC completely and unplug it from the mains before touching any internal components.
- Ground yourself with an anti-static wrist strap, or touch an unpainted metal part of the case, to avoid static damage.
- Press down the retention clips at each end of the memory slot and gently lift the module free.
- Wipe the gold contacts with a soft, dry eraser or a lint-free cloth dampened with isopropyl alcohol.
- Reinsert the module firmly and evenly until both clips click securely into place.
- Power the PC back on and run your ram diagnostics again to check whether the error has cleared.
Knowing When to Replace Faulty RAM
If errors persist after reseating and cleaning, the module itself is likely faulty. Repeated failures across several diagnostic passes strongly suggest replacement, not repair.
When buying new memory, match the speed, capacity, and generation supported by your motherboard. Check your board’s official compatibility list to avoid mismatched voltages or timings that can cause fresh errors.
| Symptom | Likely Cause | Recommended Action |
|---|---|---|
| Persistent error codes after testing | Confirmed hardware fault | Replace the memory module |
| Errors stop after reseating | Dust or loose connection | Monitor performance over time |
| Crashes under heavy workloads | Incorrect speed or voltage | Adjust XMP profile in BIOS |
| System fails to boot with new RAM | Compatibility mismatch | Check motherboard’s supported list |
Acting on these results completes our ram diagnostics process. With the right fix, whether a simple reseat or full replacement, most memory instability disappears for good.
Building and Upgrading PCs in the UK
Building a computer from separate parts remains a rewarding project for UK technology enthusiasts. Many pc building uk guides miss frustrating details, so we offer advice on compatibility, assembly and safe upgrades. Whether you are starting from scratch or improving an existing machine, this guide helps you avoid costly mistakes.
A successful build relies on more than powerful parts. Every component must work together, yet this often troubles beginners.
Choosing Compatible Components for Your Build
Matching your CPU, motherboard and RAM builds the foundation of any pc building uk project. An Intel processor will not fit an AMD socket, and different generations may need different chipsets.
We recommend checking these details before placing an order:
- CPU socket type matches the motherboard socket exactly
- RAM speed and type (DDR4 or DDR5) supported by the motherboard
- GPU length fits within your chosen case
- Motherboard form factor (ATX, Micro-ATX, Mini-ITX) suits your case size
Many UK retailers, including Scan and Overclockers UK, offer compatibility filters on their websites. These tools save time and reduce the risk of ordering mismatched parts.
Selecting Storage, Cooling and Power Supplies
Storage choice affects speed and budget. SSDs load programmes faster and run silently, while traditional HDDs provide cheaper storage for large files like videos or backups.
Cooling choices depend on how hard you plan to push your system. Air coolers suit most builds and need less maintenance, while liquid cooling handles higher temperatures better for gaming or heavy workloads.
| Component | Option A | Option B | Best For |
|---|---|---|---|
| Storage | SSD (NVMe) | HDD (7200RPM) | SSD for speed, HDD for bulk storage |
| Cooling | Air cooler | Liquid AIO cooler | Air for budget builds, liquid for high performance |
| Power Supply | 600W Bronze | 750W Gold | 600W for standard builds, 750W for gaming rigs |
A quality power supply matters more than many builders realise. We suggest choosing a reputable brand rated 80 Plus Bronze or higher, with enough power for your GPU and future upgrades.
Assembling Your PC Step by Step
Once you have gathered your parts, assembly becomes a logical process. Following a clear order reduces mistakes and makes troubleshooting easier when something fails the first time.
- Install the CPU onto the motherboard before fitting it into the case
- Attach the cooler and apply thermal paste if not pre-applied
- Insert RAM sticks into the correct slots
- Mount the motherboard inside the case using the provided standoffs
- Connect the power supply cables to the motherboard, GPU and storage drives
- Install your SSD or HDD and secure all cables neatly
- Fit the graphics card into the top PCIe slot
- Connect the monitor, keyboard and mouse, then power on the system
If the system boots and displays the BIOS screen, your build has succeeded. Problems at this stage usually result from loose connections or incorrectly seated RAM.
Upgrading an Existing System Safely
Upgrading does not require starting from scratch. Many users add RAM, install a faster SSD, or fit a new graphics card without disturbing their setup.
Before upgrading, we recommend the following checks:
- Confirm your power supply can handle the new component’s wattage
- Check motherboard compatibility for new RAM or storage interfaces
- Back up important files before making hardware changes
- Update drivers and BIOS firmware after installing new parts
Taking these precautions keeps your system stable and prevents unnecessary downtime. A careful upgrade approach extends your PC’s life without the cost of a full rebuild.
Conclusion
From first boot-up to custom builds, we want BFarber to be your site for sorting out your PC. Our windows tutorials cover daily tasks that often cause trouble. Our pc troubleshooting guides explain crashes, slow performance, and startup errors without jargon.
We’ve shared windows 11 tips to help you get more from your taskbar and desktop setup, and explained ram diagnostics. These checks can help you spot faulty memory before it causes bigger headaches. For pc building uk projects, our guides and assembly steps keep builds on track, from ordering parts to final power-up.
Technology moves fast, and new problems appear all the time. We keep adding fresh guides and updating older ones so the advice stays accurate and useful. Bookmark BFarber and return when your PC shows something unexpected or you want a new Windows trick.
Our goal remains clear, dependable, UK-focused advice that solves problems. Browse our other guides, try the fixes that suit your setup, and tell us how you get on. We’re glad to be the resource you turn to when your tech needs sorting.
FAQ
What kind of content can I expect to find on BFarber?
We focus on practical, easy-to-follow windows tutorials and dedicated pc troubleshooting advice. We also cover the latest windows 11 tips, in-depth ram diagnostics, and step-by-step support for pc building UK enthusiasts. Our plain-English guides avoid jargon, so students, gamers, home office workers, and Windows PC users can find clear, useful advice.
Do I need advanced technical knowledge to follow your Windows tutorials?
Not at all. Our windows tutorials suit everyday users, with numbered steps, bullet points, and straightforward explanations. We test everything by hand before publishing, so you can follow confidently without previous experience adjusting system settings.
How often do you update your guides to reflect changes in Windows?
We regularly review and refresh our content as Windows 11 evolves. Our windows 11 tips and troubleshooting advice stay accurate and relevant. They do not become outdated when Microsoft adds new features or changes the interface.
My PC has suddenly become slow – where should I start?
We recommend starting with our pc troubleshooting guides, which identify performance bottlenecks using Task Manager and Resource Monitor. Next, tutorials on freeing disk space, adjusting startup programmes, and optimising power settings often fix slowdowns without new hardware.
What should I do if my computer won’t start properly?
Our pc troubleshooting section covers startup errors and boot failures in detail, including Startup Repair, Safe Mode, and boot configuration checks. We explain each fix in clear, numbered steps, helping you work through them methodically.
How can I tell if faulty RAM is causing my PC problems?
Our ram diagnostics guides show you how to run the built-in Windows Memory Diagnostic Tool and read its error codes. They also explain how to use trusted third-party software, such as MemTest86, for more thorough testing. These tools can confirm whether memory issues cause random reboots or crashes before you consider replacement.
Is it safe to clean or reseat my own memory modules?
Yes, if you follow proper anti-static precautions. Our ram diagnostics content explains when to reseat modules and when test results show that faulty RAM needs replacing.
What are some useful Windows 11 features most people overlook?
Our favourite windows 11 tips include Snap Layouts for organising multiple windows. We also cover virtual desktops for separating work and personal tasks, plus voice typing and focus sessions. A full section helps readers discover these lesser-known features.
Can you help me build a PC from scratch here in the UK?
Certainly. Our pc building UK guides help you choose compatible components, including CPUs, motherboards, and RAM. They also cover storage, cooling, and power supplies, with UK retailers in mind. Our step-by-step assembly guide takes you from unboxing to first boot.
How do I know if new components will work with my existing system before upgrading?
Our pc building UK section explains how to check hardware compatibility before buying. This helps you avoid costly mistakes and safely upgrade your existing system without conflicts.
Do you offer advice on keeping Windows secure, not just running smoothly?
Yes, security is part of our core windows tutorials. We explain Windows Defender, the built-in firewall, user accounts, permissions, and software and driver updates. These steps reduce vulnerabilities without requiring third-party antivirus software.
What if my PC keeps crashing with a blue screen error?
Blue screen errors are a common pc troubleshooting concern we address directly. We show you how to read BSOD error codes and use Windows’ built-in diagnostic tools. They can help identify causes such as driver conflicts, overheating, or failing hardware components.